Showing posts with label Cookography. Show all posts

Tuesday, December 17, 2013

Soup's On! - Roasted Cauliflower & Smoked Gouda Soup

Look everyone! A new feature!!! I know I've been gone for a bit, but what better gift upon my return than to introduce a new feature? I have to preface this post with a bit of background. 

I've never made soup. Let me rephrase, I've never made soup that didn't start out by opening the can and finished with the words "Add water". I was raised on Campbell's! It's all I knew. Many years ago someone (I have no idea who) gave me an entire cookbook full of nothing but soup recipes. That book has sat on the shelf with the rest of my cookbooks for well over 20 years.

Now that I'm single again (long story, short Post-It Note!), I thought this would be a great time to attempt to dabble in the liquid food arts (Liquid food arts that didn't involve cocktails, I mean).

Being that I am following a Low-Carb lifestyle at the moment, this has meant that I need to stay away from noodle soups and anything that might incorporate dumplings of any size, shape or texture. I did some online research and found some amazing soups that I am going to try and then share with you here. Yes, the cookbook is still on the shelf. I just find that the internet has a lot more lurking out there than any book could provide me. That, and you can't Google search a book!

My first foray into the hot and bubbling liquid food arts is a Roasted Cauliflower & Smoked Gouda Soup. Granted, the recipe called for aged white cheddar cheese, but I am a huge fan of smoked gouda so I went with that. Other than that change I followed the recipe to the letter (Something, I don't usually do). I didn't want to screw this up by attempting "Flair!". You will find the recipe at the end of the post, but first, lets talk about the process and see some pictures.

Roasted Cauliflower goodness!

I have never been a huge fan of Cauliflower. I mean, any vegetable you have to cover in cheese to tolerate, can't be all that great. Roasted tho, it is amazing! For this recipe, you toss it in oil...salt and pepper it and let it roast for 30 minutes in the oven. What you get are toasted nuggets of goodness that I just wanted to eat off the pan.

You could stop right here...but you don't!

You add the roasted Cauliflower to onions, garlic, Thyme and chicken stock. That combination gets cooked for 30 more minutes until the Cauliflower is soft and then you grab your Immersion Blender and go to town! 

I had bought an Immersion Blender years ago, and it has languished in the "Special Utensil Drawer" forever. I never had a chance to use it...until now! Once you blend up the soup you then add the cheese and cook it without boiling it any longer until all the cheese is melted. What you wind up with is this...

And yes, you then add some bacon to it!
What I wound up with was an incredibly creamy and delicious soup. Till all is said and done, you don't even really taste the Cauliflower. It lends a delightful bulk to the dish which makes it quite filling.

Roasted Cauliflower & Smoked Gouda Soup

         
         Ingredients

               1        small head cauliflower- cut into florets
               2        tablespoons oil, additional oil for saute
               1        medium onion diced
               2        cloves garlic chopped
               1        teaspoon thyme chopped
               3        cups chicken stock
               11/2   cups smoked gouda cheese grated
               1        cup milk, cream or half & half
                         salt & pepper to taste

         Instructions

1.  Toss the cauliflower florets in the oil along with salt and pepper and arrange them in a single layer on a large baking sheet.
2.  Roast the cauliflower in a preheated 400 degree oven until golden brown. Approx 30 minutes.
3.  Heat oil in a large sauce pan over medium heat. Add the onion and saute until tender. Approx 5-7 minutes.
4.  Add the garlic and thyme and saute until fragrant, about a minute.
5.  Add the broth, deglaze the pan, add the cauliflower, bring to a boil, reduce heat and simmer, covered for 30 minutes.
6.  Using an immersion blender, puree the soup until it is of an even consistency. Reduce stove heat to insure the mixture no longer boils.
7.  Slowly add and stir in the cheese.
8.  Add the milk/cream/half & half, stirring constantly and ensuring that the soup doesn't boil or burn.
9.  Season with salt & pepper to taste. Serve, adding crispy bacon or addition cheese as garnish (or both even!) 

I hope everyone enjoys this recipe. Let me know if you try it out and what the results were in the comments section.

Monday, November 11, 2013

Cookography: Fried Green Tomatoes

I am a somewhat "genteel" southern woman at heart. I love my southern cooking. Be it a good spicy gumbo or boo fries. I really enjoy the huge comfort content of dishes served in the southern states.

This past weekend I took a stab at fried green tomatoes. One of my coworkers had a bumper crop of tomatoes this year and was lamenting how many of them were green, he doubted that he could get them ripened before they rot.

Me to the rescue! I told him I would take the green ones. I'm sure he thought I was crazy...but then, people often do. So, I brought them home, sliced them up and let the magic happen.

The assembly line!

So yes, a few of the tomatoes managed to ripen a bit before I got to them, but I decided to slice them up too. I prepared my buttermilk and egg bath (one egg and buttermilk to cover) and combined a "Shake & Bake" package with a healthy helping of Parmesan Cheese as my crispy goodness.

Then, I grabbed my extra large skillet and placed about a quarter of an inch of oil in it. Use whatever oil you like...I went with Canolla. Once it was hot, I took each tomato and dipped it in the liquid, and then heavily coated it in the crumb mixture. Into the hot oil they went...SIZZLE!!!

Crispy tomato goodness!
I fried them for 2 minutes on each side. You don't want the tomato to become too soft and mushy. The trick is to get them brown and keep the tomato a little firm. So, vary your cooking time with that goal in mind.

In the south, they also serve these with a spicy remoulade (aka...dipping sauce). To replicate this, I took a couple of tablespoons of mayo and added a healthy few shakes of Tabasco sauce to it and mixed it up.

Fried Green Tomato HEAVEN! These make a great side dish to any meal. I coupled them with a roast pork I had slow-cooked in the crock pot all day long. The combination of the fall-apart-in-your-mouth pork and the crispy tomatoes was fantastic!

Tuesday, December 18, 2012

Cookography: Brie, Cranberry & Pecan Tarts

We interrupt this Holiday Season to talk about the last one...Thanksgiving. Yeah, I 'm behind on posts, sue me! Anyway, I am always tasked with bringing a light appetizer to Thanksgiving dinner. It's my lot in life. Also, it's easily transportable. Last year I took the Pumpkin Garlic Bites. They were a huge hit and just the right savory combination of flavors.

This year, I was looking for a baked tart of some kind. I found something along the lines of what I was considering on the web, but it wasn't exactly what I wanted so, as I tend to do...I modified it. Here are Brie, Canberry & Pecan Tarts.

Warm, yummy, sweet and savory

They're incredibly simple to put together and since everyone complains that I never provide recipes, here is a stab at one. Remember, I hardly every use them, so take this with a grain of salt.

          Brie, Cranberry & Pecan Tarts

                    8 T   Chopped Pecans
                    8 T   Chopped Craisins
                    4 T   Honey
                    8 oz  Wheel of Brie
                    30     Filo Tart Shells

         Mix together the pecans, craisins and honey in a small bowl. Add a little extra honey if it's too dry. Here is what that will look like. Everything nicely coated, but there shouldn't be extra honey pooling anywhere.

Yeah, I could just eat this by the spoonful.

Leave it to sit at room temperature while you cut the skin off the brie and cube it into roughly half inch by quarter inch cubes. (Note: I found it easiest to cut the wheel into the half inch cubes first and then simply cut each of those cubes in half and then cut the skin off).

Preheat your oven to 325 degrees and place the tart shells on a non-stick baking sheet. Place a cube of brie in each tart shell and cover with the pecan/craisin mixture. Use all of the pecan craisin mixture. They may look over-filled, but as the brie melts it all fills in nicely. Bake for approximately 10 minutes. Keep an eye on them. I found in order to get things nicely combined I wound up baking them a little longer.

Let them cool a bit before tasting. I got anxious and burned the heck out of my mouth. That honey is hot!!! Even at room temperature they still tasted great. My Mom also just took these to a Christmas Party and they were a huge hit.

One last Thanksgiving thought...I ate too much!

My view of the table.

Monday, November 12, 2012

This is a Test: Winter Mint

Look! A new column!!! Most people assume that the confidence with which I attack my projects somehow means I have any idea how they are going to turn out. Little secret...most of the time I have no idea what the outcome will be. So, I have created the "This is a Test" column for times when I'm relatively sure that the outcome could be way worse than I imagine it to be.

I have always considered mint to be a summer delicacy. Most consider it a weed, for me it's the main ingredient in my amazing Mojitos. Mojito season officially runs Memorial Day to Labor Day for me mainly because that is when the mint flourishes. For some reason, perhaps because temps have been fairly mild here this fall, my mint is still growing.

I've decided to try storing some for the winter. Who knows...maybe I'll have Mojitos on New Year's? Anyway, I did a little research and the 2 most prevalent ways for storing mint are to freeze it inside ice cubes or to vacuum seal it. I've opted for vacuum sealing simply because the packages of finished product take up a lot less space in the freezer than a bag of ice cubes would.

I began by harvesting my mint. I pretty much decimated the plant. Winter is coming and it'll be totally dead soon, I just helped it along. Here is my harvested and carefully selected mint.

Minty heaven in a colander

Once I washed it off and patted it dry, I let it sit for a while. All of the websites said that the mint should be as dry as possible prior to vacuum sealing it. My hands still smell like mint from all the handling I did. I love that! I get the same joy out of handling basil.

I then dug out my trusty FoodSaver machine and sealed up the mint. I think it did pretty well.


FoodSaver in no way paid for this endorsement.
The true test will be when I go to use it. I'll be sure to blog about the first ever Winter Mojito!

Monday, September 10, 2012

Presto Pesto!

I have a terrible weakness, ok fine...I have many. But, one of my most crippling is the search for really great Pesto. I try Pesto dishes whenever I can at restaurants, hoping that they've gotten it right. Some have and some haven't. So, the easiest way for me to satisfy my hunger for the Perfect Pesto is to make my own.

This weekend I harvested our Basil plant and proceeded to turn it into amazing Pesto...like MAGIC! Now, let me first say that I don't use a recipe for this. A good Pesto "recipe" is all about feel and consistency. Some people prefer a wetter Pesto, some a dryer. I fall into the latter. I will walk you through my process.

Fresh from the garden...Thanks Hubby!

Granted, I should have harvested this Basil two weeks ago in it's prime, but my schedule just didn't allow for it. Still, it worked just fine. One should always start with very fresh green Basil when making Pesto. That being said, I have whipped up some passable Pesto in the past (wow alliteration!) using some high quality dried basil, but I certainly don't recommend that...except in the case of Zombie Apocalypse. 

Now, lets talk nuts. I use Pine Nuts, but there are folks that say that Walnuts work just fine...I don't agree with them, but they are entitled to their opinion. For me, Pine Nuts impart an unusual flavor your just can't get from the namby pamby Walnut. Save your Walnuts for cookies people!

Toasting is touchy!

When toasting Pine Nuts, you have to be paying attention. Pine Nuts go from browned to black in like 3 seconds! These took about 10 minutes on low heat and I was constantly flipping them around in the pan. I used just slightly over a 1/3rd of a cup pretty much because that is how many were in the bag.

Garlic! It's one of the main ingredients of Pesto and I like a lot of it!

Heaven in a hard to peel container.

I used 4 cloves of garlic for my Pesto. I was going to go for 6 cloves, but I got tired of peeling it. OK, so once you have assembled everything, you throw it all into your food processor.

About to be pulverized!

Here it is. My Basil, the Garlic, the Pine Nuts, Parmesan Cheese, and a dash of salt and pepper. Heck, I could eat is as a salad just like this. I pulse this about a dozen times in the food processor just to get everything chopped up and saying, "Hi" to everyone. Then, with the food processor on high, I begin to very slowly drizzle Extra Virgin Olive Oil into the mix. 

You want to keep an eye on this step. Too much EVOO and you wind up with really runny Pesto, which...if you like it that way, go for it. I prefer a dryer Pesto so I add just enough to incorporate the ingredients.

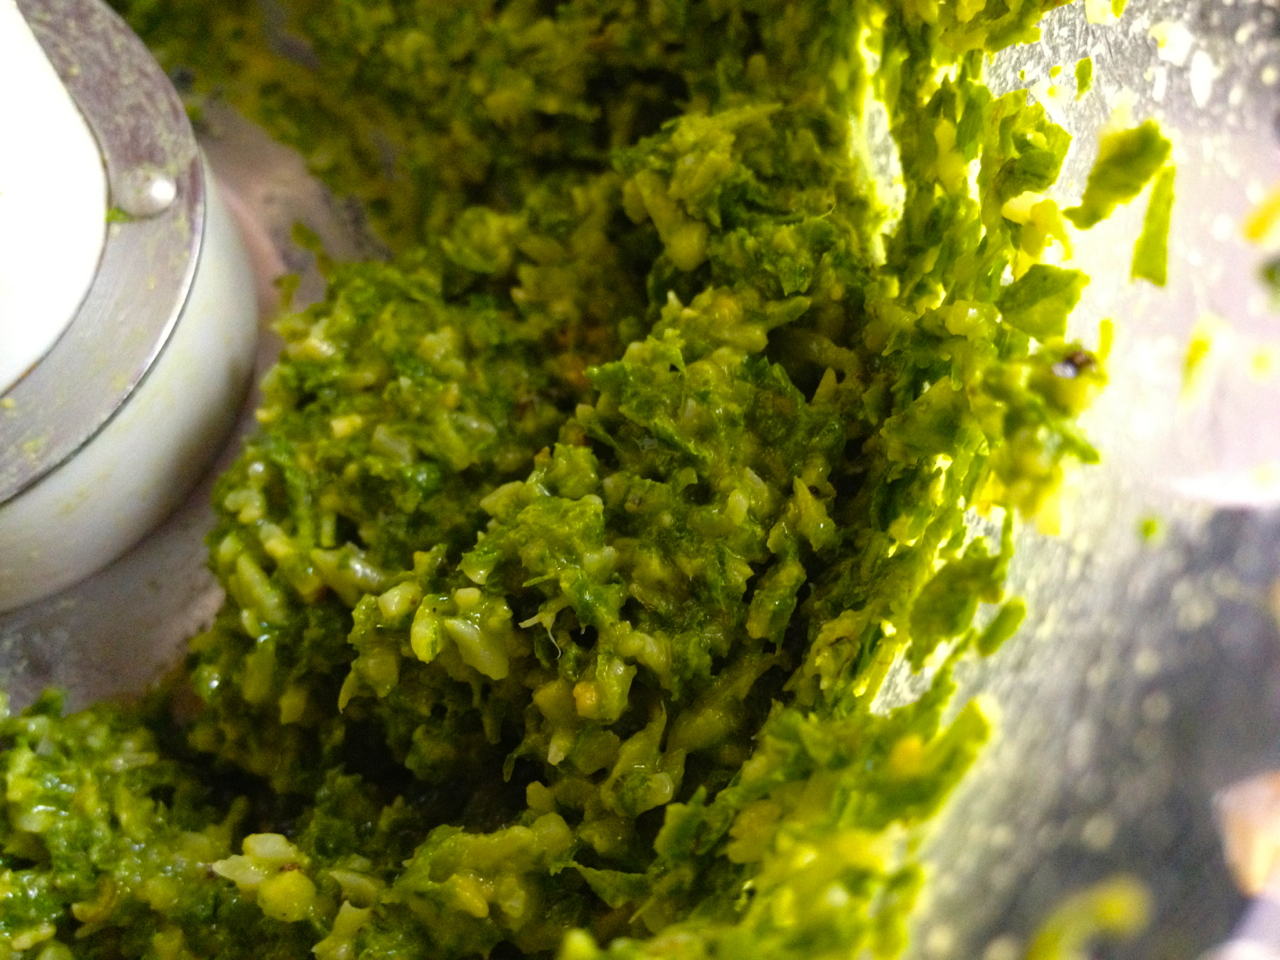
Once processed it looks pretty much like this.

Heaven in a Food Processor!

This was still a little lumpy for my tastes, so I processed it for a bit longer on high giving the blade time to cut it down even further. Here is my final result.

Just looking for some fresh pasta to mate with!
So, even after all of my careful oil pouring this turned out a little runnier than I prefer it. No problem, I just added some extra Parm to it. The cheese absorbed the oil perfectly.

Now comes the hard part. What to pair it with? Pasta? Chicken? Pork? Spread it on a piece of bread and be done? Eat it by the spoonful right out of the food processor??? That is the great thing about Pesto, you can do ANYTHING with it. I have opted this evening to coat a chicken breast in it and bake it. Nummy!

What so you like to do with Pesto? Sound off in the comments.

Monday, June 25, 2012

Cookography: Pots De Creme

I can't take credit for this recipe, although I did augment it just a touch. I found it on one of my favorite Blogs, The Pioneer Woman Cooks. I made it for my families "Father's Day/Nieces Birthday" dinner this past weekend. As I've mentioned in the past, my family doesn't celebrate any holiday on the day that it falls...Oy!

Anyway, this quick and easy dessert was just what we needed.

Perfection!

You just can't go wrong with chocolate and whipped topping. These little gems took all of 10 minutes to create and all of 2 seconds to eat. You start with eggs, chocolate chips, a dash of salt, and your desired flavoring (I used Amaretto) in a blender.

The Oster of my heart!

You mix this on low until it's well combined. Then you take a cup of strong, very hot coffee and you pour it through the lid while mixing on high. The hot coffee melts the chocolate and tempers the eggs until you have chocolate goodness you just want to pour on someone and lick it off (I digress)! You then pour it into whatever vessels you have handy. I had these little deposable shot glasses just sitting around.

An empty shot glass is no good to anyone!

I also wound up grabbing these small ramekins for the excess.

The rest I drank from the blender.

Then your refrigerate them until they are set and serve them with your favorite whipped topping. I used the Cool Whip seasonal flavor, French Vanilla.

My Mom's Boston Creme Pie in the background. Also Yummy!

These were a total hit with the family. Well, except for the family members who don't ever drink coffee. They found the coffee taste too much. Those who drink coffee didn't notice the coffee flavor at all. They focused on the chocolate...as did I. In the end these are great low sugar desserts that pack a powerful chocolate punch without being overly sweet.

Saturday, June 16, 2012

Prison Reform

A few weeks ago, before I was admitted to the hospital, I hosted a retirement party for my buddy Dave. His wife Emily asked me to provide my "space" in order to properly house the larger party. We went with a prison theme, since Dave had been a prison guard. I designed the invitations using a vintage "Get Out of Jail Free" card from my Mom's Monopoly Set.

Then we had to figure out the menu. I wanted it to have hints to the food that is served in prison. Off to Google I went and with Emily's help, I discovered Meal Loaf. It is this horrid concoction that is served to prisoners that have misbehaved. Typically it is vegetarian, but some institutions add ground beef to it. So you take beans, spinach, cut-up bread, potato flakes and few other ingredients and you make them into a loaf. You bake it and serve it up to the miscreants. The challenge for me tho, was to make it appetizing. I basically followed the recipe I had found online, but I used all fresh ingredients and topped it with cheese. I also provided a gravy to dip it in.

Ok, so I really only wound up throwing half of it out.

All in all, it wasn't too bad. I found if you dipped it and slowly chewed it, letting all the flavors come out, it was actually palatable. Some people had a problem with the raisins in it. I assume they are in the recipe to be "dessert".

I also made a big pot of Chili Mac. Apparently, they serve this often in the prison environment. I can see why, it was sooooo easy to make. Couple cans of chili, some pasta and cheese in a crock pot...done!

Simple is as simple does

What is funny is that as I was opening and dumping the cans of chili into the crock pot, I couldn't help but notice how much canned chili looks and smells like canned dog food...even sounds like it plopping out of the can.

Emily made a big ol pot of Franks & Beans, another prison staple due to it's ease. One giant can of baked beans and 2 packs of hotdogs cut up.

Beans, beans, their good for your heart. The more you eat, the more you...

I stayed away from the beans. The last thing I needed was the gas. But I did eat some of the hotdogs. After cooking in the bean juice, they were delicious. Maybe eating in prison isn't so bad as long as you stay way from the Meal Loaf.

Emily also made a cake, building on the "Get Out of Jail Free" theme. She's actually quite a good decorator of cakes. I will need to keep this in mind for future parties.

So cute! What is black icing made of???

She did a great job with the art from the Monopoly card. I am told the cake was great. I didn't try it cause well...SUGAR!

So, if you ever find yourself in prison, now you have a bit of preview of what to expect in the chow line. Oh, and remember...don't drop the soap!

Sunday, May 6, 2012

Eggy Bake

I am currently embarking on the Low Carb Lifestyle. Quite simply...I've gotten FAT! I am not going as far as to head back onto The Atkin's Diet. I found that rather extreme. Basically, I cut out processed sugar, refined flour, and other nasty carbs. To that end I am now making my Eggy Bake to have for Breakfast every day.

Breakfast combined!
The Eggy Bake is very versatile. You can throw whatever you want into the eggs, whatever floats your boat or is hanging around the fridge. Here is the base recipe...

Eggy Bake

          1 Dozen Eggs (You can substitute those cartoned egg product if you like)
          1/4 Cup Cream (I use Half & Half)
          Salt & Pepper to taste

At this point I pick my additives. In the one pictured above I chose:

          1lb Bacon (Fried crisp)
          6oz Italian Sausage (Crumbled)
          1can Diced Tomatos
          1can Sliced Mushrooms
          1handfull Fresh Spinach (sliced)
          Parmesan Cheese
          Sharp Cheddar Cheese

So what you do is line your baking pan with parchment paper. It makes it really easy to remove and then slice. Then you layer your additives into the pan. I started with the meats and then added the other items. I then sprinkled on about half of the cheese. You then mix up your egg mixture and whip the heck out of it. If you have a mixer, do it in that. The more air you can whip into the mixture the lighter and taller your bake will be. My arm still hurts from whisking mine. I did find a hint online that said you can add a quarter teaspoon of baking powder to the eggs to get them to puff up fluffier. I tried it and mine did fluff up big, but in the freezer they sunk again.

You then pour the egg mixture over the layered additives, top with the rest of the cheese and pop it in a 350 degree oven for 40 minutes. I under cooked mine by about 5 minutes only because I knew I would be freezing them and them nuking them in the microwave. Here is what it looks like coming out of the oven.

Pam that pan under the parchment...I am still trying to soak mine!
Once cool, I lifted it out of the pan by the parchment paper and cut it into 8 equal squares. I placed them in Zip-Loc bags and placed them in the freezer for later use during the week. It microwaves well. I go for about 2 minutes once it has thawed. Otherwise it gets as hard as a brick.

One note I do have. I used bacon in mine which I had fried very crisp. Unfortunately, once baked and nuked the bacon winds up kind of limp.

So give it a try! Let me know in the comments what you added.

Friday, May 4, 2012

Easter Bunny Flop

Do not try this at home. Let me perfect it first, then you can try it. Many people are aware of my aversion to onions. I don't really hate them, but I hate their effect on me. They make me burp...a lot! Not only do they make me burp, but those burps burn. I have been kept up entire nights by onions and no tummy remedy seems to help.

While in State College at The Hubby's family for Xmas I adored his stepmom's Green Bean Casserole. It was so yummy I had 3 helpings. On the third I bemoaned how miserable it was going to make me later because of the French Fried Onions. She turned to me, and in the most matter-of-fact tone said, "There aren't any onions in that." Well you could have knocked me over with a feather. I just stood there alternating my gaze between her and what I was sure was the "Evil Onion Topping", aghast that Green Bean Casserole could possibly be made without French Fried Onions.  I said, "Well if there are no onions, what is that deliciously crispy topping?" "Sautéed bread crumbs", she replied as if the entire world made their Green Bean Casserole that way. Of course, I took all of the leftovers home. Yes, I can be terribly selfish. Ask anyone I know!

Fast forward to Easter at my mother's house. Actually, it was the week after Easter. My family never manages to celebrate holiday's on their actual date...it's our dysfunction. (Perhaps one of many) My mom requested that I bring this fabled Green Been Casserole to dinner. Yikes! So I had The Hubby call his stepmom to ask how they were made. No help! I got, "Brown the bread crumbs in butter till they are crunchy". So, I got a lot of butter and bread crumbs.

Look at all that delicious butter!
Now, let me admit...I did cut a corner. In hindsight it was one of 2 corners that I probably shouldn't have cut. I used store-bought bread crumbs instead of ripping up my own bread...come to find out that is what his stepmom does. Alas, I figured bread crumbs were bread crumbs. What I wound with was this.

Brown, crispy, edible SAND!
I pushed forward tho. I got out my frozen green beans...like the classic recipe called for, my second poor decision. My mother uses canned green beans, because they are already tender. I would have needed to bake this 2 hours to get those frozen beans as tender. Anyway, I mixed them with my mushroom soup and some cream of celery soup (another internet suggestion I should have ignored) and popped it all in the oven thinking, "It'll be ok...everything will crust up just fine. 

I don't have an after pic, I was too ashamed to take one. Flop, Flop, Flop! Luckily, everyone tried it and were gracious enough not to say a word about how horrible it was. That's family for ya! But, no one wanted any of the leftovers...not even me! 

On an up note, my sister...whom I would never call creative, or whimsical, or even feminine for that matter, brought the cutest platter of deviled eggs. I was rather impressed and it made me feel even worse about my dish. Now THAT is what family is for.

Isn't that just adorable!
She had an egg that cracked funny when she was peeling them and instead of throwing it away...she made it the center piece. Now that is something I would usually do! I guess I was just off my game this time around.

I pledge tho, to get this No Onion Green Bean Casserole perfected. One day you may be eating it as an appetizer at one of my parties! That, and I'll be able to write a proud blog post about it!

Sunday, January 1, 2012

Happy 2012 Everyone!

Well, New Year's Eve has come and gone with little or no damage to life, limb, or property. The "Come See The Tree Before It Dies" Party here at Sanctuary was a great success (except for those who missed it…you know who you are!). One might say that Tod and Scott had a little too much to drink once we got up to The Lodge, but it certainly wouldn't be me. Imagine that, I was the DD last night. That almost never happens!

Anyway, back to the party. This time I decided I wanted to make things that I had never made before. No Puke Dip or Fabulous Meatballs this time. I went with a "Create Your Own Canape" idea. I had seen a graphic in a New York Times article showing the many possibilities for Canape creation and it got me to thinking. Why not let my guests play with their food?

Signage! How cool is that?
That way I didn't have to do a lot of assembly. I could create pieces and then let the guests put it together in whatever fashion they chose.

For the bases, I purchased an assortment of crackers, mini-toasts, toasted french bread, and was given some hearty bread made by some Bosnian friends of my sister.

Those Wasa Crisps look like you could build a house with them. Sturdy!
The spreads are where I got to have my fun. I made a Chicken Liver Pate, a Salmon Mousse, and what I am calling, "Sort of Aunt Carol's Pimento Cheese Spread" (that will get a post all to itself at some point). I also had some Homemade Pesto in the freezer that I defrosted and a Roasted Veggie Bruschetta that my sister had given me for Christmas.

Mmmmmmm, goodness at the end of a knife.
Once a guest had chosen a spreadable (to my delight someone decided to mix the pate with the mousse and came up with a Surf & Turf canape!) they could either pop it in their mouth at that point, or move on to the toppings area. Here, I got to chop, grate and open lots of jars. Very little cooking involved.

Thyme, Dill, Capers & Spicy Pomegranate Sauce
Dry-Roasted Walnuts, Black Olives, Parmesan & Maple Roasted Apples
I didn't actually do the math, but given the number of ingredients, there were quite a few ways all of these various bases, spreads and toppings could have been combined. I enjoyed the Pate on mini-toasts with a caper or 2 on top. The Salmon Mousse was delicious with a black olive or 2 and some parmesan. The cheese spread went well with the Thyme (Who knew?) and dry-roasted walnuts gave the Pesto a nice little kick. I saw guests putting together all kinds of combinations. I wish at the end of the line I had made them all "Show & Tell" their creations with everyone.

The Assembly Line Party!
In addition to the "Create Your Own Canape" line I also provided some "more typical" party fare.

Tablescape!
On the dining table are Chips & Dips and Crudite with a delicious Lemon Dill Dip. My mother brought a couple plates of her Christmas Cookies and some of her Homemade Peanut Brittle.

Oh! I almost forgot. At the last moment I came up with a cocktail for the party. I was just going to retread The Poisoned Apple since very few people got to sample it at the Halloween Party (thanks snow!) But it really didn't fit the theme of the party. So with a little browsing around (thank you interwebs) I came up with this.

Crappy art, but I had time constraints!
My apologizes to Dick Clark. I did not ask his representation if I could use his name on the party cocktail. They can sue me later. Basically, it's a Cosmo constructed a little on the light side and then Prosecco Bubbly is added once all of the other ingredients are shaken and poured into the martini glass. I also can't take credit for the cocktail recipe. I found it over here and only modified it slightly. All I can take credit for is the combination of the two. Both if which will probably get me sued. Not to mention the art I stole to create the graphic to display on my bar. Ryan Seacrest will also probably not be happy with me for blocking out his name in the above art with the word "Cosmopolitan".

Apparently, my New Year's Resolution is to be sued by one or more parties for various incursions. What's your New Year's Resolution???

Friday, December 30, 2011

Christmas Eve

It's been a tradition for a few years now that Scott and Tod (my 2 BFF's) rotate hosting our Christmas Eve gathering at each of our houses. This year was my turn!

Just waiting for that tree to fall & crush the table
Here are a few shots from the evening. These are of the table-scape that I created for the evening. Nutcrackers, alcohol, and fire, what could possibly go wrong?

It really is all about the lighting. Never overpower the surroundings
Don't worry. I'll get to the food in a minute. I'm still looking at the table!

Bubbly glamour shot!
Ok, now food! After discussing it with Tod, I decided on Lasagna. Why? I've never made Lasagna in my entire life!!!!! I can't take credit for the recipe. I searched online for weeks till I finally decided on this one from one of my favorite blogs, The Pioneer Woman Cooks. Click over and check out her site once you are done here…it's amazing. My Lasagna may have been a half hour late, but it was really, really good! Look!

Bubbly, cheesy, meaty goodness!
Yum! Scott was in charge of providing the salad. Sorry Scotty, I didn't take any pictures of the salad. We were so ready to eat that it was gone before I thought to grab the camera. It was great tho, field greens, croutons, golden raisins, etc and 2 wonderful dressings to try. Tod was in charge of dessert. I asked him not to do anything too chocolatey cause I'm just not a fan of that. So instead…

Tart Heaven!
He found, or possibly made (I'll never tell which), these amazing fruit tarts. I would love to think he spent a day slicing fruit and assembling these. They were yummy and not too sweet or filling. He also brought some Baklava that was quite good, but I didn't sample that until the next day.

It was a lovely evening and such a delight to spend it with The Hubby and 2 such incredibly wonderful friends. It really is what the Holiday season is all about for me.

Saturday, September 10, 2011

Flava Flave

Once again, it's time to highlight one of my favorite things. This one is newly discovered thanks to The German Host Mom.


She was asking for bouillon, so off I went to the store. I've never been a fan of bouillon. I find it very salty and rarely does it taste like the flavor that it's supposed to.

In the soup section I found these Swanson Flavor Boost packets. They were on sale, so I had to try them. OMG, they are spectacular! It's a liquid, so you don't have to wait for it to dissolve. They have considerably less sale than bouillon cubes AND they taste like what they're supposed to taste like.

She liked using the vegetable flavor on salads and those spectacular green beans she made. I used some of the beef flavor when making my Mushroom and Swiss gravy. NUMMY!

The only product I have ever found that are better than these is…


They are spectacular. However, they can be difficult to find and are a little on the expensive side. Not to mention the fact that once you open them you have to store them in the refridgerator. I don't know about you, but I don't have the space in my fridge to have something in there just sitting around waiting for the odd moment I might need to use it.

The individual packets of the Swanson Flavor Boost can sit in your pantry forever waiting to be used. Then you use a packet and pitch the empty in the trash. HEAVEN!

Tuesday, July 19, 2011

Cookography -- Soo Shee Spinach Salad

I believe I have talked about this appetizer before. Soo Shee Spinach Salad first appeared at my 40ish Birthday Bash a little over a year ago. It's all the ingredients of a spinach salad on a cracker you can pick up and eat in 2 or 3 bites.


This one is all assembly, no cooking involved if you use the pre-cooked bacon and get the hard-boiled eggs at the deli. The trick is to find a sturdy cracker. Then it is just a matter of layering the spinach, bacon, egg, and onion onto it. I topped it with a raspberry vinaigrette. At the end of the party there were 4 left. No one could eat an entire one by that point, so we all just picked off the ingredients that we liked. Yeah, I ate the bacon…and an egg or 2.

Saturday, July 16, 2011

Cookography -- Asparagus Stocks

Bacon! I swear you could wrap it around dog turds and they would taste good. I'm not going to try it, but I bet it would. Instead, I wrapped bacon around very tiny, skinny asparagus stalks and then roasted it all in the over for about 10 minutes.

So pretty from above
I used the pre-cooked bacon to cut down on the roasting time. Otherwise the asparagus would have probably burned before the bacon was cooked.

Martini glasses…not just for martinis anymore!
I then whipped up a simple Dijon Mustard and Peppercorn Ranch dipping sauce and placed it in a martini glass in the center of the platter. Who cares if they taste like crap (which they did not!) as long as they look good, I'm happy.