Hello everyone. My apologizes for being so light on posting while I am in Chicago. I was really hoping I would have more time to do things and post about. But that didn't happen.
My thanks to those who kept checking the blog and commenting on what little I had posted. Once I am home tomorrow I promise a huge post about Chicago and the few things I did get to do while I was here. I've also got a couple of "My Favorite Things" posts that go along with it.
Rest assured, I am still alive...Chicago is still my favorite city...just not for 16 days straight. I would be hard pressed to find any city that would be for that long.
Thursday, March 31, 2011
Tuesday, March 29, 2011
I've Lost Count
I've lost count of so many things. I have no idea how long it's been since I've posted to the blog. I have no idea how long it's been since I read any blogs. I have no idea what day of the week it is. I have no idea when I last ate.
Chicago has quickly become a blur. It's cold here now so once I make it back to the hotel I don't feel like going anywhere. Last night I lied down to take a nap at 7pm and didn't wake up until 5:30am this morning.
I love this city...but I am so ready not to be here.
3 days left. That much I know.
Chicago has quickly become a blur. It's cold here now so once I make it back to the hotel I don't feel like going anywhere. Last night I lied down to take a nap at 7pm and didn't wake up until 5:30am this morning.
I love this city...but I am so ready not to be here.
3 days left. That much I know.
Saturday, March 19, 2011

Wednesday, March 16, 2011
V is for…Vomitous

I know, a while back, I told you how excited I was about this series. Well, I was wrong. Wrong, Wrong, Wrong!
I was willing to give it a chance. Most series, if they don't have me by the 4th episode, they're toast. V was given a reprieve because I saw such hope in the series. The casting was amazing, the plot possibilities limitless, and they have access to much better visual effects than the original had. How could it go wrong?
I'll tell you how it could go wrong. By ending it's season (series? It hasn't been renewed yet) the exact same way it ended it's second (horrible) mini-series. This time it wasn't a magical child saving the day, it was a magical child enslaving all of humanity…but seriously, had the series writers learned nothing?
They pulled out all the stops for this finale, perhaps they know they aren't coming back, so it doesn't really matter. There were probably 4 different points that the writers could have gone an entirely different way with. At every turn they made the wrong decision. This culminated with the "Magical Child" and that, my blog readers, is were they lost me. Five minutes before the ending credits rolled.
I hope it does return for a 3rd season. I'd hate to see some of these actors out of work. But I will not be returning. I couldn't swallow the "Magical Child" ending the first time around. They certainly are not going to shove it down my throat twice like some furry Guinea Pig.

 |
| Just for reference |
Tuesday, March 15, 2011
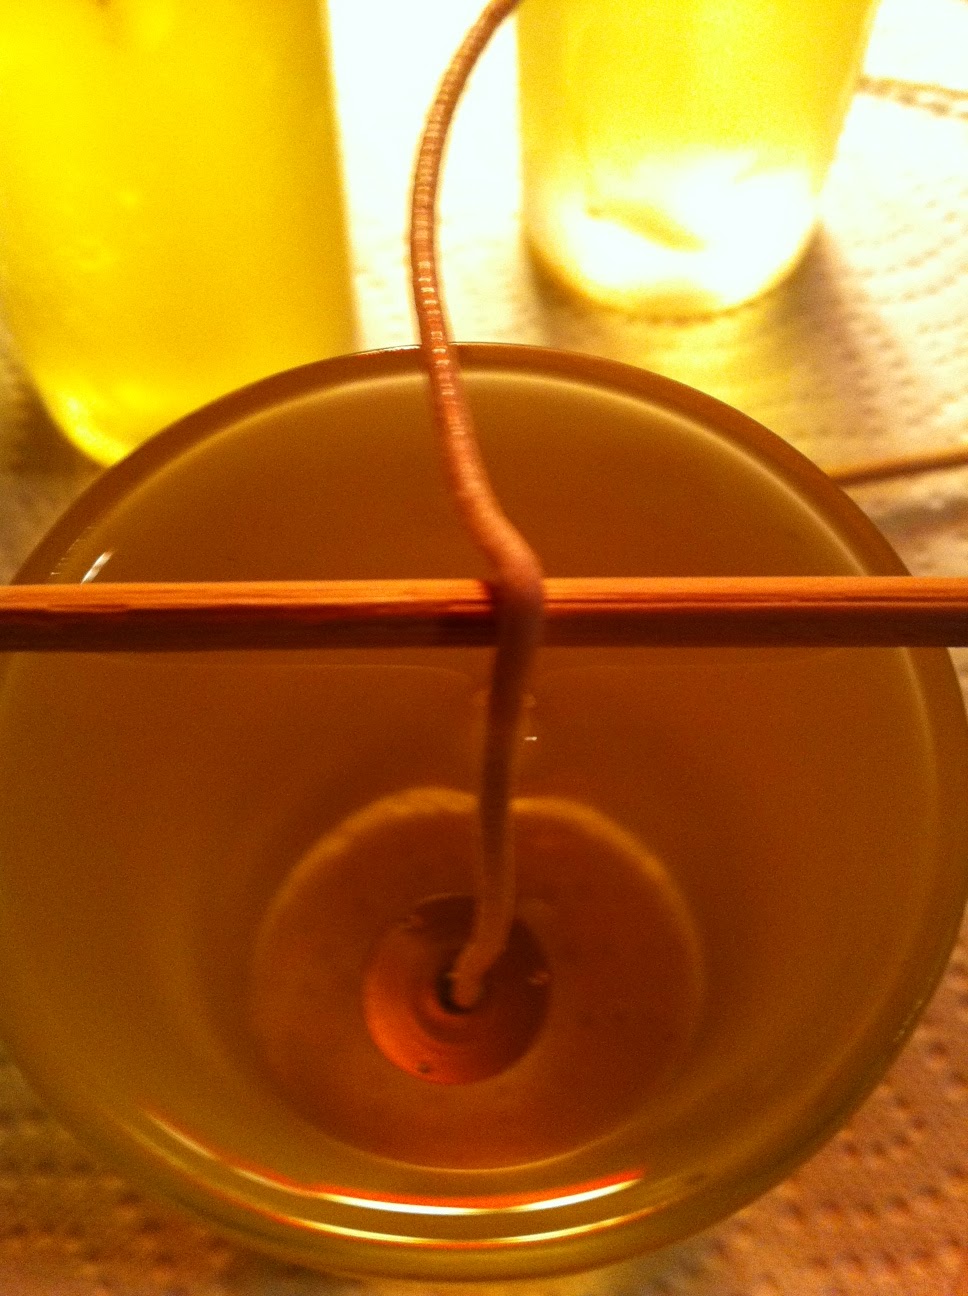
Sir-Mix-A-Lush -- The Fuzzy Man-D-Cran
This one is for Kimmy!
I can't take credit for creating this cocktail. Scott came up with the mixture. He called me one night, apparently, after having a few of these concoctions to ask what he should name it.
Since I gave it name, I am including it here.

Recipe --
Start with a Rocks Glass filled with ice and add:
1oz Absolut Mandarin Vodka
1oz Absolut Peach Vodka
1oz Cranberry Juice
Top off with Sprite(Diet or Zero if you like), garnish with an orange slice if you like, and serve.
It's an unlikely combination of flavors, but it works on many levels. It's sweet without being too sweet, tart without being too tart, and fizzy all at the same time.
Monday, March 14, 2011
Nirvana In My Home - The Bar
Sorry, I know I have been planning this post for a while. But, here it is…My Bar! When I moved into The Church I made a few decisions. There would be a high speed internet, there would be no cable TV, and there would be a FULL BAR. Part of it was just the naughtiness of putting a full bar in a church, but I also planned for this to be the perfect party space, and for that you need a good bar.
Here is what the original bar looked like.


It served it's purpose very well. It was also too small to handle the amount of liquor I wanted to offer to my guests…and ultimately myself. So once, the back room, which now houses the Bedroom, Bathroom, Laundry Room and Closet was complete I decided to rearrange and increase the size of the bar.
Here is the new and improved bar.

One third larger and more spectacular! Also, the new bar is closer to the kitchen which isn't a bad thing. My hope someday is to put a little sink of it's own behind this bar, but it's going to require some creative plumbing to do so.


The liquor dispensers are still my favorite part. I have the Rum Dispenser and the Vodka Dispenser. They put out a perfect ounce of your desired libation. No proper bar should be without them. You will also note that the wines from my previous post are here in quantity!


So that's the bar. Hope you enjoyed. Feel free to stop by for a cocktail sometime. I should note, I don't stock Tequila, it's the one liquor I can not tolerate. So if you're in the mood for a margarita…head somewhere else…or bring your own :-)
Here is what the original bar looked like.


Here is the new and improved bar.

One third larger and more spectacular! Also, the new bar is closer to the kitchen which isn't a bad thing. My hope someday is to put a little sink of it's own behind this bar, but it's going to require some creative plumbing to do so.


The liquor dispensers are still my favorite part. I have the Rum Dispenser and the Vodka Dispenser. They put out a perfect ounce of your desired libation. No proper bar should be without them. You will also note that the wines from my previous post are here in quantity!

No bar should be without a refrigerator of some sort. I chose a smaller one in this case so that I can keep small quantities of mixers chilled for drinks. The shelving unit it sits on is an entertainment center I found at Walmart. Perfect for this reuse. Next to it is my case of Beaujolais and another thing everyone should have, a decent sized cooler. You never know when you might be taking the bar on the road. Well, I do know. It goes to the beach with me every year.

Friday, March 11, 2011
Sir-Mix-A-Lush -- My Signature Cocktail
I apologize for starting this feature without first introducing you to my bar. I promise that post isn't too far away. But I couldn't wait to get started showing off some on my libationous configurations. Pretty much, it's just another good excuse to drink! Tho, I 'm not sure I've ever really needed an excuse.
I christen this new feature with…

Backstory --
Many years ago, well about 17 to be exact, I was just getting into liquor. Prior to that I was a cheap beer drinker. GASP! I know, folks who know me now would never believe that. I discovered that I enjoyed Rum, after a few mishaps with some other forms of alcohol that didn't exactly leave a good taste in my mouth…especially the second time past it, if you get my drift.
So many of the Rum drinks I sampled were terribly sweet and I am not a "sweet drink" kind of guy. So I set out to find a combination of ingredients I could enjoy my Rum with. I had always liked Vodka Tonics, except for the Vodka. So I decided to combine Rum with Tonic Water. Then came the task of finding another mixer or two for the drink. It was a long arduous (and drunken) task, but I finally settled on orange juice. It's not too sweet and it's not too bitter. The quantity of the juice was hard to nail down. A shot was way too much. You totally lost the taste of the Rum. Even a splash (by most bartenders measure) is even too much. So I settled on "A Whisper of Orange Juice". If forced to explain what a "whisper" is, I'd have to say a tablespoon may even be too much. The Riff was born!
The Recipe --
Start with a Rocks Glass filled with ice, then add:
2 ounces Light Rum
Fill with Tonic Water to almost the top
Add a "Whisper" of Orange Juice
Stir, and serve
A word about garnish. I rarely mess with it. It just wastes space that could be better filled by liquor as far as I'm concerned. For the purposes of the above photo, I used an orange. Please feel free to use whatever you would like.
Variations --
The Riff Raff - Use 2 ounces of Spiced Rum in place of the Light Rum. I usually garnish this one with a cinnamon stick if I have any lying around. The drink gets spicier the longer you drink it.
Riff - The Dark Side - Use 2 ounces of Dark Rum instead of Light Rum
I christen this new feature with…
The Riff - My Signature Cocktail

Many years ago, well about 17 to be exact, I was just getting into liquor. Prior to that I was a cheap beer drinker. GASP! I know, folks who know me now would never believe that. I discovered that I enjoyed Rum, after a few mishaps with some other forms of alcohol that didn't exactly leave a good taste in my mouth…especially the second time past it, if you get my drift.
So many of the Rum drinks I sampled were terribly sweet and I am not a "sweet drink" kind of guy. So I set out to find a combination of ingredients I could enjoy my Rum with. I had always liked Vodka Tonics, except for the Vodka. So I decided to combine Rum with Tonic Water. Then came the task of finding another mixer or two for the drink. It was a long arduous (and drunken) task, but I finally settled on orange juice. It's not too sweet and it's not too bitter. The quantity of the juice was hard to nail down. A shot was way too much. You totally lost the taste of the Rum. Even a splash (by most bartenders measure) is even too much. So I settled on "A Whisper of Orange Juice". If forced to explain what a "whisper" is, I'd have to say a tablespoon may even be too much. The Riff was born!
The Recipe --
Start with a Rocks Glass filled with ice, then add:
2 ounces Light Rum
Fill with Tonic Water to almost the top
Add a "Whisper" of Orange Juice
Stir, and serve
A word about garnish. I rarely mess with it. It just wastes space that could be better filled by liquor as far as I'm concerned. For the purposes of the above photo, I used an orange. Please feel free to use whatever you would like.
Variations --
The Riff Raff - Use 2 ounces of Spiced Rum in place of the Light Rum. I usually garnish this one with a cinnamon stick if I have any lying around. The drink gets spicier the longer you drink it.
Riff - The Dark Side - Use 2 ounces of Dark Rum instead of Light Rum
 |
| Riff-The Dark Side, The Riff Raff, and the Classic Riff |
Thursday, March 10, 2011
16 Days In My Favorite City
I'm starting to get excited. Next Thursday I take off for 16 glorious days in my favorite city…Chicago! True, the trip is for work so much of my day will be taken up with mundane tasks. But that's ok…I'll still have my nights.
I'll be staying downtown at the Sheraton Hotel and Towers which is right in the thick of things and a very nice hotel to boot. I'm a short walk from everything I could possibly need, want or desire there.
Lots of things make Chicago my favorite city. It's on a lake, it's got great food, and an Apple Store. Thankfully things will be starting to warm up a little bit during my trip. It's possible we could get some winter weather, but for the most part it will be fading.
I remember many many years ago, when I first started this job, I was working in Chicago. It had been a terribly long day and because I was the new guy I was tasked with managing all of the remote areas that were at hotel properties. This meant spending a lot of time in cabs running around the city troubleshooting. After a particularly difficult afternoon at the Hyatt on Wacker Drive, I stepped outside after hours of technical difficulties to take a much needed ciggie break. I was really hating my job at that moment and pretty much was on the verge of tears. I remember lifting my head and before me lay the Chicago downtown skyline with all of it's marvelous architecture and all of the crap I was feeling at that moment melted away.
I was in another city, a beautiful city, and most importantly...I was there on someone else's dime AND getting paid for it! It made me giddy. I sat there in front of the Hyatt hotel and laughed my butt off. Since that day, no matter how hard my job becomes when I am traveling, I think back to that afternoon and while it no longer makes me giddy…it still makes me smile.
I'll be staying downtown at the Sheraton Hotel and Towers which is right in the thick of things and a very nice hotel to boot. I'm a short walk from everything I could possibly need, want or desire there.
Lots of things make Chicago my favorite city. It's on a lake, it's got great food, and an Apple Store. Thankfully things will be starting to warm up a little bit during my trip. It's possible we could get some winter weather, but for the most part it will be fading.
I remember many many years ago, when I first started this job, I was working in Chicago. It had been a terribly long day and because I was the new guy I was tasked with managing all of the remote areas that were at hotel properties. This meant spending a lot of time in cabs running around the city troubleshooting. After a particularly difficult afternoon at the Hyatt on Wacker Drive, I stepped outside after hours of technical difficulties to take a much needed ciggie break. I was really hating my job at that moment and pretty much was on the verge of tears. I remember lifting my head and before me lay the Chicago downtown skyline with all of it's marvelous architecture and all of the crap I was feeling at that moment melted away.
 |
| My view that day. It's crooked cause I was giddy, Ok? |
Tuesday, March 8, 2011
Bake-A-Liciousness: The King Cake
And another new feature! Am I boring you yet?
For some reason, I have been obsessed with Mardi Gras this year. I think it might have something to do with the fact that I'm not being forced to spend 30 days in New Orleans for work this year. The King Cake is a Mardi Gras tradition. It's a filled pastry ring topped with icing and colored sugar/icing…yum! Inside a small plastic baby is hidden. They say that the person who finds the baby in the cake is either King/Queen for the day or guaranteed good luck all year long. It depends on who you ask. Neither is a bad option as far as I'm concerned.
My original plan was to order these cakes from a bakery in New Orleans so they would be authentic. Well, my research (thank you Google) led me to many bakeries, but the prices were outrageous. I'm not paying $75 for a cake, no matter how authentic it is. I decided to make the King Cakes myself. I am, by no means, a spectacular baker. The whole process is a little too rigid for me. If you're a teaspoon off on an ingredient it can ruin everything. The recipes I found online for King Cakes didn't make me feel any better about it. There was all this kneading and raising and more kneading. I am NOT a kneady person.
So I then searched Google for EASY King Cake recipes. I found one. It even has step-by-step photos. I can't go wrong! Well, I could, but not as horribly wrong as I could have gone with the more complicated recipes.
I'm not going to post my process here, the links are above should you decide to try it. I will note that instead of trying to find little plastic babies, I have gone the traditional route and am hiding a dried kidney bean inside my cakes. That is what they did back in the days before tiny plastic babies were invented.
I will admit that I made 3 of these suckers. I highly recommend that when you are trying a dish or baked good you have never made before. My first attempt looks a little mutated, but the icing will cover that up. The other 2 came out quite nice, so nice in fact I can't tell which was second or third at this point. The mutated one is staying here and the other 2 are heading off to work with The Hubby and I. I wonder if his coworkers find it odd that I bake for them???
Anyway, here is my final product.
Now all I have to do is get really drunk, trade beads for the opportunity to see someone's naked body parts and puke in the street. It'll be just like I'm there in New Orleans for Mardi Gras!
For some reason, I have been obsessed with Mardi Gras this year. I think it might have something to do with the fact that I'm not being forced to spend 30 days in New Orleans for work this year. The King Cake is a Mardi Gras tradition. It's a filled pastry ring topped with icing and colored sugar/icing…yum! Inside a small plastic baby is hidden. They say that the person who finds the baby in the cake is either King/Queen for the day or guaranteed good luck all year long. It depends on who you ask. Neither is a bad option as far as I'm concerned.
My original plan was to order these cakes from a bakery in New Orleans so they would be authentic. Well, my research (thank you Google) led me to many bakeries, but the prices were outrageous. I'm not paying $75 for a cake, no matter how authentic it is. I decided to make the King Cakes myself. I am, by no means, a spectacular baker. The whole process is a little too rigid for me. If you're a teaspoon off on an ingredient it can ruin everything. The recipes I found online for King Cakes didn't make me feel any better about it. There was all this kneading and raising and more kneading. I am NOT a kneady person.
So I then searched Google for EASY King Cake recipes. I found one. It even has step-by-step photos. I can't go wrong! Well, I could, but not as horribly wrong as I could have gone with the more complicated recipes.
I'm not going to post my process here, the links are above should you decide to try it. I will note that instead of trying to find little plastic babies, I have gone the traditional route and am hiding a dried kidney bean inside my cakes. That is what they did back in the days before tiny plastic babies were invented.
I will admit that I made 3 of these suckers. I highly recommend that when you are trying a dish or baked good you have never made before. My first attempt looks a little mutated, but the icing will cover that up. The other 2 came out quite nice, so nice in fact I can't tell which was second or third at this point. The mutated one is staying here and the other 2 are heading off to work with The Hubby and I. I wonder if his coworkers find it odd that I bake for them???
Anyway, here is my final product.
 |
| I wish the yellow icing had been yellower and the purple more purpler. That's what I get for having such a vivid green…oh well, next time |
Monday, March 7, 2011
Craftaculosity! - Crock Pot Candles
Whoo Hoo! A new feature, I know you're as excited as I am.
When one, as I do, has a lantern fetish...along with that comes a need for candles. Lots of candles. My affinity for lighting the lanterns does tend to wane in the summer time. I feel like the last thing I need to add to the heat and humidity of a typical Maryland summer is one more flame. Rather than spending a chunk of change on the amount of candles it would take me to get through a typical Fall and Winter, I discovered this very simple way to make my own candles. I certainly can't take credit for the idea, but I have refined the process a bit and would like to share it with all of you.
I always shied away from the idea of candle making because it was so crafty and something Martha Stewart probably spends her late nights forcing the mexican slaves on her compound to toil at. (Just kidding Martha, don't be lawyering up on me) Quite frankly it seemed like a real mess. Molds and melting and wax, Oh My! So off to the interwebs I went to find an EASY way to make candles. I found an obscure blog posting about Crock Pot Candles and my salvation had appeared.
It's very simple. This is a great project if you know you're going to be around the house most of the day. It doesn't require constant attention, just a check every now and then. All you need is a large Crock Pot. Mine is a 6 quart oval by Hamilton Beach. Next you need to choose a wax. For my first batch I used a wax I found at Michael's, but since then I order Soy Wax in bulk from Amazon.com which comes in a convenient flake form. It's much easier to choose a wax in flake form or granulated form to work with. Some paraffin waxes come in huge blocks that just wouldn't be easy to work with. You'd have to use a cheese grater on those in order to make them usable for this project. I chose soy wax, not for it's environmental pluses, anyone who knows me knows that I don't give a crud about that. I chose it because it is long burning and really easy to clean up.
Next you need to choose the vessels that will house your wick and wax. I typically use a variety of sizes ranging from a votive to things about 3 inches in diameter. The trick here is to choose containers that will fit your use. I am using mine mainly in lanterns so that means we are looking at smaller, thinner sized vessels. Sometimes to just fill up the Crock Pot, if I need to, I will grab some unusual containers for fun. I also have found that for lantern lighting it is good to use containers that are frosted. They provide a brighter light inside the lantern.
The final item you will need are wicks. My research has found there are tons of wick styles out there. I was lazy so I went with what the craft store had to offer me. The rule of thumb is "Smaller wicks for smaller containers" and vice versa. I chose 2 sizes of wicks, both with the little metal bases pre-attached to them. A "waxed" firm wick is always a good choice because they will stand straighter in your containers. Before my next batch of candles I vow to do some more wick research and in the future I will buy my wicks in bulk and attach the bases to them myself. I am convinced that this has to be cheaper than buying the craft store versions.
Let's talk about scent. I am not a fan of smelly candles. You are welcome to smell up your house to any level you choose. For my purposes I chose 2 very light scents from the craft store…Ocean Breeze and Fresh Linen. The internet also has tons of options, but I am wary of purchasing scents without smelling them prior. (Sorry for that one opened package I didn't like the smell of Michael's) Really, who packages a scent in a blister pack and expects anyone to purchase them "smell un-sniffed"?
Coloring? I don't color my candles. They are being used in lanterns and that extra step would be a waste of time for that purpose. The soy wax in it's raw form hardens to a nice soft white color that is perfect for my use. Please feel free to color your candles till the cows come home. There are many options available for that at the craft stores.
And on to the process..I work on a large glass cutting board on my kitchen island. It's way easier to get any spilled wax off that than it is the countertop. Place your empty Crock Pot on any surface you like. I always do a test fit of the vessels I am planning to use before I begin. It gives me an idea of how many batches I am looking at and lets me play with their placement in the Crock Pot to insure I am getting maximum yield with the fewest number of batches.
Once I have settled on my arrangement, I fill the vessels with the wax, place them in the Crock Pot and crank that sucker up on HIGH.
There is no need to place any water in the bottom of the Crock Pot, it's not getting hot enough to cause any damage. I place the lid on the Crock Pot to speed the process along. As the wax flakes (in my case) melt you will need to add more. I check the pot every 20 minutes or so and refill the vessels as needed. Once the Crock Pot has gotten heated to full steam I will usually turn it back to LOW unless I am in a real hurry (which I hardly ever am). The process of topping off the vessels continues until all of the wax is melted and the vessels are at the level you want them.
I always go until the vessels are completely filled with the melted wax. Some shrinkage occurs during cooling, so filling them to the top means that once they cool, they are at the perfect level.
Once all of the vessels are full and melted I turn the crock pot off and let things begin to cool. Now is when you would add any scent you might like to. I go with 4 drops for a votive sized vessel and then up from there for larger ones. I've never used more than 8 drops of scent. Like I said, I don't like smelly candles. My only goal with scent is to slightly cover the wax smell which soy wax has hardly any of. I let everything set for about an hour before messing with the wicks. This allow the wax to congeal slighty, but it's nowhere near actually hardening yet. After the hour has passed I remove the candles to a hard flat surface. They can still be hot, so be careful and use a hot pad or what I do is fold up a few paper towels to grab them with. This serves 2 purposes. First, not all Crock Pots have level bottoms, and no one wants a crooked candle. Also, once out of the Crock Pot, the candles will cool and harden much faster than if they are left in. It's up to you…handle hot wax or have crooked, long-cooling candles. I take the risk, because it's worth it.
Once on the flat surface, it's time to play with wicks. First, make the wick as straight as you can. Then submerge it into the hot wax. Don't worry, it's not going to stay straight up in the hot wax…it never does. I employ toothpicks and wooden kabob sticks to "help" the wick stay where it needs to.
The point is to get the base of the wick in the center of the vessel's bottom and then to have the top of the wick as close to the center at the top as possible. It doesn't have to be perfect. Mine are not perfect. It's just important that the wick not be too close to the edge of the vessel at any point. It's a good way to break the vessel halfway through the burn. You will notice in the above picture that for the taller candles I bend the wick over the kabob stick in order to keep it from bending too close to the side of the container. The smaller sized candles are much easier to center.
At this point, walk away…gently. No jumping jacks next to the counter, or your wicks will move and fall. Now is a good time to run to the grocery store, sit down and read a book, sip a cocktail, or surfporn Facebook on the internet. Once you return, your candles will look something like this.

Now, there may be bubbles or cracks in the surface depending on how fast or slow the wax cooled. DON'T PANIC! Simply take one of those "fire starter" lighters with the incredibly long barrel on them and even out the tops of the wax. It will then cool to perfection. The last step is to trim your wicks. I use my kitchen sheers for this, but any set of scissors will work as long as they are sharp. I usually leave about 1 quarter inch of wick above the wax line. Then all that is left to do is put those candles to work.
P.S. - Once you've burned the candle the entire way, pop out the metal disk from the burnt wick and you are ready to go when you make your next batch. Any unused wax remelts for the new candle. I only wash the vessel if there are wick remnants or soot remaining on it.
When one, as I do, has a lantern fetish...along with that comes a need for candles. Lots of candles. My affinity for lighting the lanterns does tend to wane in the summer time. I feel like the last thing I need to add to the heat and humidity of a typical Maryland summer is one more flame. Rather than spending a chunk of change on the amount of candles it would take me to get through a typical Fall and Winter, I discovered this very simple way to make my own candles. I certainly can't take credit for the idea, but I have refined the process a bit and would like to share it with all of you.
I always shied away from the idea of candle making because it was so crafty and something Martha Stewart probably spends her late nights forcing the mexican slaves on her compound to toil at. (Just kidding Martha, don't be lawyering up on me) Quite frankly it seemed like a real mess. Molds and melting and wax, Oh My! So off to the interwebs I went to find an EASY way to make candles. I found an obscure blog posting about Crock Pot Candles and my salvation had appeared.
It's very simple. This is a great project if you know you're going to be around the house most of the day. It doesn't require constant attention, just a check every now and then. All you need is a large Crock Pot. Mine is a 6 quart oval by Hamilton Beach. Next you need to choose a wax. For my first batch I used a wax I found at Michael's, but since then I order Soy Wax in bulk from Amazon.com which comes in a convenient flake form. It's much easier to choose a wax in flake form or granulated form to work with. Some paraffin waxes come in huge blocks that just wouldn't be easy to work with. You'd have to use a cheese grater on those in order to make them usable for this project. I chose soy wax, not for it's environmental pluses, anyone who knows me knows that I don't give a crud about that. I chose it because it is long burning and really easy to clean up.
Next you need to choose the vessels that will house your wick and wax. I typically use a variety of sizes ranging from a votive to things about 3 inches in diameter. The trick here is to choose containers that will fit your use. I am using mine mainly in lanterns so that means we are looking at smaller, thinner sized vessels. Sometimes to just fill up the Crock Pot, if I need to, I will grab some unusual containers for fun. I also have found that for lantern lighting it is good to use containers that are frosted. They provide a brighter light inside the lantern.
The final item you will need are wicks. My research has found there are tons of wick styles out there. I was lazy so I went with what the craft store had to offer me. The rule of thumb is "Smaller wicks for smaller containers" and vice versa. I chose 2 sizes of wicks, both with the little metal bases pre-attached to them. A "waxed" firm wick is always a good choice because they will stand straighter in your containers. Before my next batch of candles I vow to do some more wick research and in the future I will buy my wicks in bulk and attach the bases to them myself. I am convinced that this has to be cheaper than buying the craft store versions.
Let's talk about scent. I am not a fan of smelly candles. You are welcome to smell up your house to any level you choose. For my purposes I chose 2 very light scents from the craft store…Ocean Breeze and Fresh Linen. The internet also has tons of options, but I am wary of purchasing scents without smelling them prior. (Sorry for that one opened package I didn't like the smell of Michael's) Really, who packages a scent in a blister pack and expects anyone to purchase them "smell un-sniffed"?
Coloring? I don't color my candles. They are being used in lanterns and that extra step would be a waste of time for that purpose. The soy wax in it's raw form hardens to a nice soft white color that is perfect for my use. Please feel free to color your candles till the cows come home. There are many options available for that at the craft stores.
And on to the process..I work on a large glass cutting board on my kitchen island. It's way easier to get any spilled wax off that than it is the countertop. Place your empty Crock Pot on any surface you like. I always do a test fit of the vessels I am planning to use before I begin. It gives me an idea of how many batches I am looking at and lets me play with their placement in the Crock Pot to insure I am getting maximum yield with the fewest number of batches.
Once I have settled on my arrangement, I fill the vessels with the wax, place them in the Crock Pot and crank that sucker up on HIGH.
 |
| Flaky wax goodness |
 |
| Refill, Refill, Refill |
Once all of the vessels are full and melted I turn the crock pot off and let things begin to cool. Now is when you would add any scent you might like to. I go with 4 drops for a votive sized vessel and then up from there for larger ones. I've never used more than 8 drops of scent. Like I said, I don't like smelly candles. My only goal with scent is to slightly cover the wax smell which soy wax has hardly any of. I let everything set for about an hour before messing with the wicks. This allow the wax to congeal slighty, but it's nowhere near actually hardening yet. After the hour has passed I remove the candles to a hard flat surface. They can still be hot, so be careful and use a hot pad or what I do is fold up a few paper towels to grab them with. This serves 2 purposes. First, not all Crock Pots have level bottoms, and no one wants a crooked candle. Also, once out of the Crock Pot, the candles will cool and harden much faster than if they are left in. It's up to you…handle hot wax or have crooked, long-cooling candles. I take the risk, because it's worth it.
Once on the flat surface, it's time to play with wicks. First, make the wick as straight as you can. Then submerge it into the hot wax. Don't worry, it's not going to stay straight up in the hot wax…it never does. I employ toothpicks and wooden kabob sticks to "help" the wick stay where it needs to.
 |
| Look! Two didn't need any help! |
 |
| Bending longer wicks helps |
 |
| See, it doesn't have to be perfect…just close |
At this point, walk away…gently. No jumping jacks next to the counter, or your wicks will move and fall. Now is a good time to run to the grocery store, sit down and read a book, sip a cocktail, or surf

Now, there may be bubbles or cracks in the surface depending on how fast or slow the wax cooled. DON'T PANIC! Simply take one of those "fire starter" lighters with the incredibly long barrel on them and even out the tops of the wax. It will then cool to perfection. The last step is to trim your wicks. I use my kitchen sheers for this, but any set of scissors will work as long as they are sharp. I usually leave about 1 quarter inch of wick above the wax line. Then all that is left to do is put those candles to work.
Are we all lit?
 |
| This is 2 full batches. 25 candles |
 |
| The Beauty Shot |
Friday, March 4, 2011
Volt-tacular!
I had the pleasure today of dining at Volt. For those of you who aren't aware, this is the restaurant in downtown Frederick that is owned and operated by that chef guy(Bryan Voltaggio) who was on Top Chef with his brother. Keep in mind, this is a restaurant I would never spend my own money to eat in…mainly because it's EXPENSIVE! But today my company picked up the tab because we were entertaining clients.
It really was an amazing meal…unlike any I have ever had. For lunch you have the option of choosing items from the 3 course menu($25) or the 5 course "Pre Fixe" menu($55). There is also a "Snack" menu you can choose from in the lounge.
Before I get into the food, let's talk about the restaurant itself. It is housed in a grand old mansion in downtown frederick that used to be a suite of medical offices and a pharmacy. Believe me, when it went up for sale I looked into it. Of course, it was way out of my price range and would have required major renovation. Oh well, I live in an church…good trade off.
We were seated in a private dining room, that I can only guess, used to be the sun porch of the house. There are large windows all around it with a beautiful view of the courtyard. Once Spring fully arrives I think it will be truly beautiful to dine in there.
We were served by a total of 4 people. One guy kept our sparkling or still water glasses filled. Our waitress took our order, checked on us often and then when it came time for the food to be served or cleared all 4 of them would walk in at the same time to perform the duty. It was nice not having to wait for everyone to get their food or have it cleared.
Now, on to what I had to eat. I decided not to order a cocktail, although their cocktail menu is quite extensive. Work was paying for it and I didn't want to appear to be a Lush, even tho I am. They carry a line of natural sodas from New Jersey. I opted for the ginger ale, and asked them to add some pomegranate to it. Light, crisp and delicious
From the menu I chose first, "cherry glen farm goat cheese ravioli butternut squash, maitake mushrooms, sage air". There is another dish I wish I had chosen, but one of my coworkers did, so I at least got to taste it.
It really was an amazing meal…unlike any I have ever had. For lunch you have the option of choosing items from the 3 course menu($25) or the 5 course "Pre Fixe" menu($55). There is also a "Snack" menu you can choose from in the lounge.
Before I get into the food, let's talk about the restaurant itself. It is housed in a grand old mansion in downtown frederick that used to be a suite of medical offices and a pharmacy. Believe me, when it went up for sale I looked into it. Of course, it was way out of my price range and would have required major renovation. Oh well, I live in an church…good trade off.
 |
| The Entrance |
 |
| The Menu & View |
Now, on to what I had to eat. I decided not to order a cocktail, although their cocktail menu is quite extensive. Work was paying for it and I didn't want to appear to be a Lush, even tho I am. They carry a line of natural sodas from New Jersey. I opted for the ginger ale, and asked them to add some pomegranate to it. Light, crisp and delicious
 |
| Boylan Bottleworks Ginger Ale with Pomegranate Syrup |
 |
| Sorry for the lighting. |
The ravioli was flavorful and stuffed with the most smooth and delicious cheese. The mushrooms were tender and the Sage foam added a finish to the dish that I wasn't expecting at all. I mean, how much flavor could a foam have??? The perfect amount!
My second course was the "pork loin brussels sprouts, braised red cabbage, creamsicle sweet potato, turnip greens".
 |
| Presentation is EVERYTHING! |
What cute little pork loins! I am no fan of Brussels Sprouts, but these were delicious. I was a little concerned that there wouldn't be enough potatoes to go around, but I was left with one dab for the final bite. The red dots are a red wine reduction that had a jellied consistency to it and really brought out the flavor of the pork.
Then came dessert! I selected the "honeycrisp apple mascarpone gelato, opal basil".
 |
| Those are Basil buds in the whipped cream. Yummy! |
This dish had just enough sweet and savory to make it wonderful. The apple was tender, but not mush. The honey crisp was more of a biscuit, tender and flaky, while the gelato was spicy and sweet and soooo creamy. There are dots of caramel and a spicy cinnamon sauce around the plate.
All in all, a perfect meal. I didn't leave feeling stuffed to the gills, but satisfied and still not hungry for dinner yet. Oh, I almost forgot…you are sent home with a treat!
 |
| A lovely parting gift |
Inside is a personal sized coffee cake. I am saving it for breakfast tomorrow.
Ok, I have raved and raved and raved. Now lets talk about the one thing I was disappointed by. The coffee. I'm sure it was delicious as well, but I never got a chance to taste it. We all ordered coffee with our dessert. First of all, we were almost done our dessert before the coffee came to the table. They prepare their coffee in a French Press at the table and forgot mine when they came with everyone else's. Then the waiter was so hurried in preparing mine that he pushed the plunger really quickly which resulted in a lot of the coffee grounds winding up in my coffee instead of under the plunger where they belong. I, unfortunately, didn't notice this Faux Pas until after he was out the door. Apparently, he also did not notice it. So I didn't get any coffee because I wasn't taking the time to spoon all the grounds out of the cup to do so.
So that is Volt. I hope you get a chance to try it. I'd certainly recommend going for lunch before splurging on a dinner there. Bon Appetite!
Subscribe to:
Posts (Atom)